How to Make an Instagram Carousel On Canva
Share
HOW TO MAKE AN INSTAGRAM CAROUSEL ON CANVA (STEP-BY-STEP + FREE TEMPLATES)
I'm going to be real with you.
I used to spend 3 hours making ONE carousel.
Three. Hours.
Picking colors. Choosing fonts. Second-guessing every design choice.
Then I'd post it and get 47 likes.
Meanwhile, some random account with half my followers was getting hundreds of saves on carousels that looked way simpler than mine.
I was frustrated.
Angry, actually.
I thought I was doing everything right.
But here's what nobody told me back then.
The secret isn't spending more time designing.
The secret is having a system.
And today, I'm going to give you that system.
By the end of this post, you'll know exactly how to make an Instagram carousel on Canva in under 15 minutes.
Even if you've never touched Canva before.
Even if you think you're "not creative."
Let's go.
What Even IS an Instagram Carousel?
Before we dive in, let's make sure we're on the same page.
An Instagram carousel is a post with multiple images or slides.
You've seen them.
You swipe through.
Each slide shares a new piece of information.
Maybe it's tips. Maybe it's a story. Maybe it's a before and after.
The point is: you're not limited to one image.
You get up to 20 slides to share your message.
And here's why that matters.
Instagram's algorithm LOVES carousels.
When someone swipes, that counts as engagement.
More engagement = more reach.
More reach = more followers.
More followers = more sales.
See how that works?
Carousels are basically a cheat code for the algorithm.
And the best part?
You don't need to show your face.
You don't need fancy software.
You just need Canva and a plan.
Why Canva is Perfect for Instagram Carousels
I've tried other design tools.
Adobe. Photoshop. Even random apps on my phone.
Nothing beats Canva for carousel creation.
Here's why.
Free to use. You don't need the paid version to make amazing carousels.
Drag and drop. No design degree required.
Templates galore. Start with something that already looks good.
Works on any device. Phone, tablet, laptop. Doesn't matter.
Easy to learn. If you can click a mouse, you can use Canva.
Most importantly?
Canva saves your brand colors, fonts, and logos.
So every carousel you make looks consistent.
Professional.
Like you hired a designer (even when you didn't).
How do you make an Instagram carousel on Canva?
Answer:
- Open Canva and create a custom size (1080 x 1350 pixels)
- Plan your content before designing (hook, main points, CTA)
- Choose a carousel template or start from scratch
- Customize colors, fonts, and text to match your brand
- Duplicate slides and change content for each
- Design a strong hook for slide 1 and clear CTA for last slide
- Download as PNG with all pages selected
- Upload to Instagram using the multiple image feature
That's the short answer. Now lets dive into step by step in detail.
Step 1: Set Up Your Canva Canvas
Alright, let's get into the actual tutorial.
First things first.
Go to Canva.com and log in.
Don't have an account? Make one. It's free.
Now click "Create a Design."
You'll see a search bar.
Type "Instagram Post" and select the square option.
The size should be 1080 x 1080 pixels.
That's the standard Instagram square size.

But wait.
Here's a pro tip most people miss.
Vertical carousels perform better.
Why?
They take up more screen space in the feed.
More space = more attention.
So instead of 1080 x 1080, try 1080 x 1350 pixels.
You'll need to click "Custom size" and type those numbers in.
1080 width. 1350 height.
Hit create.
Now you've got your canvas.

Step 2: Plan Your Carousel Content (Before You Design)
This is where most people mess up.
They open Canva and just start designing.
No plan. No structure. Just vibes.
And it shows.
Here's what I do instead.
I write out my carousel BEFORE I touch Canva.
Grab a notes app or piece of paper.
Write down:
Slide 1: Your hook. The thing that makes people stop scrolling.
Slides 2-8: Your main content. Tips, steps, points, whatever.
Last slide: Your call to action. What do you want them to do?
Example:
Slide 1: "5 mistakes killing your Instagram growth"
Slide 2: Mistake #1
Slide 3: Mistake #2
Slide 4: Mistake #3
Slide 5: Mistake #4
Slide 6: Mistake #5
Slide 7: "Here's what to do instead..."
Slide 8: "Save this and follow @yourhandle for more"
See how simple that is?
You're not reinventing the wheel.
You're following a format that works.
Pro tip: Keep each slide to ONE main idea. Don't cram everything onto one page.
White space is your friend.
Step 3: Choose Your Carousel Template (or Design From Scratch)
Now the fun part.
You've got two options here.
Option A: Start from scratch.
This means designing everything yourself.
Choosing colors. Fonts. Layout. All of it.
If you're new to design, this can be overwhelming.
But if you want to learn, go for it.
Option B: Use a template.
This is what I recommend for beginners.
And honestly? I still use templates even after years of doing this.
Why?
Because templates save HOURS.
Someone already figured out what looks good.
You just customize it.
In Canva, click "Templates" on the left sidebar.
Search for "Instagram carousel."
You'll see hundreds of options.
Scroll until something catches your eye.
Click on it.
Now you've got a starting point.
Step 4: Customize Your Template With Your Brand
Here's where your carousel becomes YOURS.
Start changing things.
Colors: Use your brand colors. Don't have brand colors? Pick 2-3 that represent your vibe. Stick with those consistently.
Fonts: Use max 2 fonts per carousel. One for headlines. One for body text. Keep it readable.
Images: Add your own photos or use Canva's stock library. Just make sure they match your aesthetic.
Text: Replace the placeholder text with your actual content. Remember slide 1? Time to add that hook.
Click on any element to edit it.
It's drag and drop.
Move things around until it feels right.
Delete what you don't need.
Add what's missing.
This should take 10-15 minutes max.
If you're spending longer, you're overthinking it.
Done is better than perfect.
I cannot stress this enough.
Step 5: Duplicate Your Slide
Here's the magic of Canva for carousels.
You've designed one slide.
Now duplicate it.
Hover over your slide.
Click the two-square icon (duplicate).
Now you have two identical slides.
Change the text on slide 2.
Add your second point or tip.
Keep the design the same.
This creates consistency.
Repeat this process for every slide.
Duplicate. Change text. Duplicate. Change text.
By the end, you'll have 5-10 slides that all match.
They look cohesive.
Professional.
Like a set.
That's what makes carousels so satisfying to swipe through.
Step 6: Design Your First and Last Slides (They Matter Most)
I need to call this out specifically.
Your first slide is EVERYTHING.
It's the only slide people see before they decide to swipe or scroll past.
Make it count.
Use a bold statement.
Ask a provocative question.
Create curiosity.
Example hooks that work:
- "Stop doing this on Instagram"
- "5 things nobody tells you about..."
- "The truth about..."
- "Why your carousels aren't getting saves"
- "This changed everything for me"
See how those make you want to swipe?
That's the goal.
Your last slide matters too.
This is where you tell people what to do next.
Save this post.
Follow for more.
Comment your thoughts.
Check the link in bio.
Whatever your call to action is, make it clear.
Don't leave people hanging.
Step 7: Download Your Carousel
Alright.
You've got all your slides designed.
They look amazing.
Time to download.
Click "Share" in the top right corner.
Then click "Download."
Here's the important part.
Under "File type," select PNG.
Under "Pages," select all pages.
This will download each slide as a separate image.
Exactly what you need for Instagram.
Click download.
Wait for it to process.
Save it to your phone or computer.
Done.
Step 8: Post Your Carousel to Instagram
Open Instagram.
Click the plus icon to create a new post.
Select your first carousel image.
Here's the trick.
TAP the icon that looks like stacked squares.
That lets you add multiple images.
Select all your carousel slides IN ORDER.
Slide 1 first. Then slide 2. Then slide 3. And so on.
Instagram lets you add up to 20 images.
Once selected, click next.
Add your caption.
Add your hashtags.
Post it.
Congratulations.
You just created and posted an Instagram carousel using Canva.
It probably took you 20-30 minutes your first time.
Next time? 15 minutes or less.
The Shortcut Most People Don't Know About
Can I be honest for a second?
Even with everything I just showed you, making carousels takes time.
Not a crazy amount.
But it adds up.
Especially if you're posting multiple times per week.
Here's what I learned the hard way.
Consistency beats creativity.
Every single time.
The accounts that grow fastest aren't the ones with perfect designs.
They're the ones that post consistently.
But how do you stay consistent when creating carousels takes 20-30 minutes each?
You use done-for-you templates.
I'm talking about templates that are already designed.
Already structured.
Already proven to get engagement.
You just plug in your content and go.
No more staring at blank Canva screens.
No more second-guessing your design choices.
No more spending hours on something that should take minutes.
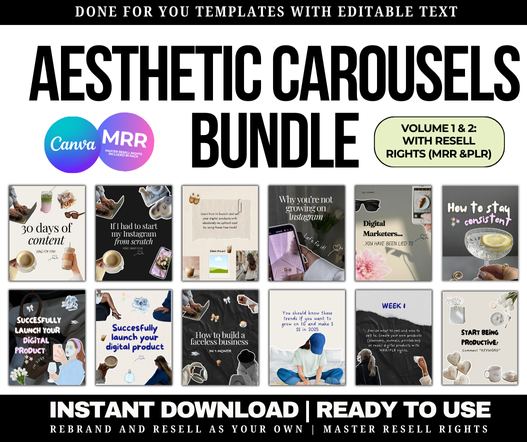
This is exactly why I put together our Instagram Carousel Templates collection.
These aren't generic Canva templates everyone's using.
They're designed specifically for coaches, marketers, and content creators.
They're aesthetic.
They're professional.
And they come with PLR rights.
That means you can customize them, post them as your own, and even resell them if you want.
Imagine having a month's worth of carousel content ready to go in one afternoon.
That's what these templates give you.
Check out the Instagram Carousel Templates here
Instagram Carousel Design Tips (From Someone Who's Made Hundreds)
Before I let you go, here are some quick tips that'll level up your carousels.
Keep text readable.
If people have to squint, they'll swipe away.
Use fonts that are clear.
Make text big enough to read on a phone screen.
When in doubt, go bigger.
Use contrast.
Dark text on light backgrounds.
Light text on dark backgrounds.
Don't put yellow text on a white background.
Your eyes will thank me.
One idea per slide.
Don't cram three tips onto one slide.
Spread them out.
Let each point breathe.
Add visual hierarchy.
Your main point should be the biggest.
Supporting text smaller.
This guides the eye.
Stay on brand.
Use the same colors across all your carousels.
Same fonts.
Same style.
This builds recognition.
People should see your carousel and immediately know it's you.
Common Instagram Carousel Mistakes (Avoid These)
I've seen so many people mess these up.
Don't be them.
Mistake #1: Walls of text.
Nobody wants to read an essay on each slide.
Keep it short.
Punchy.
Easy to digest.
Mistake #2: No hook on slide 1.
If your first slide is boring, nobody swipes.
Start strong or don't start at all.
Mistake #3: Inconsistent design.
One slide is pink. Next is blue. Next has a completely different font.
It looks messy.
Stick to one style per carousel.
Mistake #4: Forgetting the CTA.
You put all this effort into your carousel.
Then you don't tell people what to do next.
Always end with a clear call to action.
Mistake #5: Posting and ghosting.
You post your carousel and disappear.
Instagram notices when you don't engage.
Stay active. Reply to comments. Interact with your audience.
How Often Should You Post Instagram Carousels?
This question comes up a lot.
My honest answer?
As often as you can stay consistent.
If that's once a week, great.
If that's three times a week, even better.
Quality and consistency beat quantity.
I'd rather you post one amazing carousel per week than seven mediocre ones.
That said, carousels perform so well that I recommend making them a regular part of your content mix.
Mix in some Reels.
Add some single-image posts.
But make carousels your foundation.
They build authority.
They educate your audience.
They position you as the expert.
And they convert followers into customers.
Your Next Step
You've got everything you need now.
The steps.
The tips.
The mistakes to avoid.
But here's the thing.
Reading about carousels won't grow your account.
Making carousels will.
So here's my challenge to you.
Create ONE carousel today.
Just one.
Use the steps I gave you.
Don't overthink it.
Don't make it perfect.
Just make it done.
Post it.
See what happens.
Then make another one tomorrow.
And another one the day after.
This is how growth happens.
One post at a time.
One carousel at a time.
If you want to fast-track the whole process?
Grab our done-for-you Instagram Carousel Templates.
They'll cut your creation time in half.
Give you professional designs without the headache.
And help you stay consistent even when life gets busy.
You've got this.
Now go make something.
Here is something I think you'll love:
- How to Start a Faceless Instagram Account - natural fit when discussing not showing face
- PLR Digital Products Page - when explaining PLR rights on templates
- Instagram Carousel Templates - All our carousel products in one page
- Conversion Content Formula product - when discussing content that converts
- Aesthetic Faceless Business Bundle - for readers interested in faceless marketing
📌 Save This Tutorial to Pinterest
Making your first Instagram carousel? Pin this step-by-step Canva tutorial so you can reference it every time you create!
↓ Click the image below to save to your Pinterest board ↓


